Old Posts

Saturday, November 12, 2016

Need a small layout? Grab a door!

Door layouts are quite popular, especially in the N scale community.  smaller than a sheet of plywood, more maneuverable inside hallways, and very light, hollow core doors offer advantages that traditional 4x8 layouts don't have.  Besides that, they are incredibly cheap, spend $35 for a 36x80 inch door, and then about the same amount on foam, and you have the start of a great layout.

But what if you have many scales?  What if you don't have the space or money to build a dedicated layout for every possible size train you own?  This right here is the solution, glue a rug on top of a door, lay down some track, and have fun!

And so I give you, the door layout!


This whole setup cost about $80, was built in 2 hours, and I had trains running by the end of the afternoon!

To lay things out, here's the step by step process:

STEP ONE:

You'll need:
  • A hollow-core door as wide as you can get, but 36 inches is sufficient
  • An indoor/outdoor grass rug with short fibers.  Size will have to be at least as big as the door.
  • A can of spray adhesive
  • A can of spray paint (chose black, but any color of your choosing works fine)
  • A small box (50-100) screws with a pan head to secure the perimeter of the rug
That's all!  Total cost on the receipt was $67 dollars, but  I added some change for the spray paint and screws which I had laying around in the garage.

The first thing to do is take your door, peel off any stickers, and spray the edge of the door.  You could do the underside if you wanted, but just the edges will be fine, it'll give a trim and professional look.


STEP TWO:

Gluing the rug to the door.

Once the paint is dry (10-20 minutes for the quick-dry paint) the gluing can begin!  First, unroll your grass mat and decide which side you want to face up.  For mine, one side was clearly meant to be the 'down' side of the mat and the other was clearly the 'up' side.  So take the 'up' side and be sure to roll the rug so that it is on the INSIDE of the roll, not the outside.  That way, when you unroll the rug onto the door with fresh glue, you won't be gluing the wrong side.


 After applying the adhesive, slowly unroll the mat over the door, being sure to keep the mat straight and flat against the door's surface.  Once the door has been covered, run your hand over the mat to smooth out any wrinkles or air pockets.  This is important so that N and HO scale trains can be ran without trouble.

STEP THREE:

Securing the perimeter.

Now that the rug has been applied to the door, you may wish to further protect the rug from having it's edges tore up or de-laminating from the door's face.  To do so, the best and simplest way is to secure the perimeter with short screws with a pan head.  The wide head of the screws holds the mat better than drywall screws or screws with a countersinking head.

To keep the screws in line with each other, I used a straight edge to space the screws apart evenly.  I worked from one side to the center, and then went to the other side and did the same.  The result was a fairly straight line of screws, evenly spaced, that didn't spoil the professional look of the table.


STEP FOUR:

Trimming the rug.

Depending on what material your rug is made of, you may have to use a knife, serrated steak knife, or even a saw or a rug cutting tool.  My grass mat merely required a sharp box cutter blade so I flipped the table over and cut along the edge, leaving about 1/4" of overhang.  The result was this:


One last thing to note:


I didn't add any legs to this table.  To do so would require adding 2x4 bracing under the layout to strengthen the luan plywood.  However, if you happen to have an old table or a couple of sawhorses, you can have the layout elevated without much cost or effort.


Saturday, June 25, 2016

Planning a Model Railroad

After over a year of largely neglecting this blog and the hobby as a whole, I've decided to get back into it.  Over the last year a lot of things have changed.  Finally I have some space to work with, and a little extra income now and then to use.  So since I'm back in the saddle again, the next series of posts will chronicle my journey of planning a model railroad.

Now then, this subject has been touched on many times before, including this blog, but usually the process is described as a step-by-step guide or as sort of a vague series of questions to ask.  The fact is that a good model railroad is created by a blend of creativity and limits.  Think of your model railroad as a fabulous painting.  You, the painter, get to choose the colors, shape, texture, and paint medium.  However, you are still bound by a canvas and the limits of the chosen medium.  Similarly, the modeler gets to chose the era, region, style of modeling, and the process of building a layout.  However, you are still bound by the shape of the space, the size of your budget, limits of the modeled prototype, and limits placed on your time and family.

If all this is complicated, it's because it is.

Givens and Druthers

Model Railroaders have created a simple system that takes this daunting task and reduces into two lists, givens and druthers.  The idea is not a new one, John Armstrong (Wikipedia Link: John Armstrong) coined the term and adapted the idea from other hobbies.  Basically, the Givens and Druthers serves as a basis of what can be done, an estimation.  The two lists help determine the major physical aspects of the railroad and gives the plan some meat for the modeler to chew on.

The "Givens" list contains all the limitations and must-haves that your layout must adhere to.  This would include the shape of the room, how big your budget is, major icons of the prototype being modeled, how much time you have, what areas are needed for other uses, limitations of the scale being used, etc... These are the limitations of your canvas and vision.

The "Druthers" list contains everything you would like to see on the model railroad, but these items are negotiable.  These items can be whatever you want, but be sure to remember that in the end these come second to the "Givens" list.  These items are the choices you have to make based on the givens list.

To put it another way, it's just like writing a play or book, or making a movie.  Writers write many chapters that never make it to the book, directors shoot plenty of film that ends up on the floor of the editing room.  We all would like to make a fantastic story, or model in our case, but to make the concept workable some things simply have to go.  Which things go and which things stay is up to you.

The Ideal Railroad

Unfortunately, I've been chasing an ideal railroad over the last few years.  The fact is that an ideal railroad does not exist.  There is no universal design, track plan, or concept that will fit all modelers.  To be blunt, there is too many variables at play, a near infinite amount.  And once you take into account the opinions of modelers and limits of the various scales, it's clear that nothing can work for everyone.  So rather than pursuing an ideal railroad, you will make much more progress by accepting that you can't have everything you want, but that doesn't mean the project will be any less fun.

Similarly, there is no one scale that works for everyone.  If such a scale existed, it would be small enough to work on a 2x4 foot piece of plywood, have the detail of G scale, be able to run from any power source, able to be used on all club layouts, is very cheap, and requires no maintenance.  There is nothing that fulfills all these requirements, but every scale does specialize in one or two of these ideals.  And that leads us into the next area of planning...

Finding Your Scale

This is the difficult part of planning, because you can't have a track plan until you have decided upon a scale.  There are plenty of scales out there, and a while back I compiled a list of all the scales and gauges (may have forgotten a couple) All Scales and Gauges 

But to simplify, the main US scales include Z, N, HO, S, O, and G scale plus there is a 3 foot gauge and 30 inch gauge option for most of these.  Basically, any US prototype can be modeled in one of these scales.

So how do you find your scale?  From what I can tell, there are several factors that contribute to deciding the scale:

  • Size of the space for the layout
  • Your dexterity
  • Your eyesight
  • Amount of detail you wish to have

The smaller the space you have for a layout, the smaller your gauge will likely be.  But that is offset by how good your eyesight is and how well you can work on models.  If you have great vision and good hands, you can work on small scales.  But if  you need help seeing small objects and have shaky or arthritic hands, working in a larger scale is best. Then there is the amount of detail you wish to have.  N scale looks great, but it's detail is nowhere near that of G scale or even HO scale.  Of course, some things are just going to be too small to see in N scale, but if you really want detail, HO and larger is your best option.

Basically, choosing a scale is all about compromise.  You can't get everything you want, but you should be able to have fun anyway.  And in case you are wondering, the most common scale in the US is HO (1:87.1 scale), probably because it's the best compromise from the above list.

Coming Full Circle

Finally, after deciding on a scale, you can go back to the list of givens and druthers, take into account your prototype, and get to work on a solid track plan!  Track planning in the next step before beginning layout construction.
 

Saturday, April 9, 2016

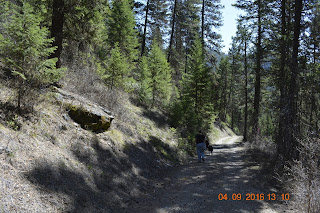
Pardee, a very. very old ghost town.

I'll do a future post that details the history of Pardee, Montana, but for now here are the photos from my first visit to the site.  The area includes the ruins of a mill/concentrator, atleast three cabins or support buildings for said mill, and some clues on the existence of the town itself.